React i18next in class component

Challenge: translate strings in Class Components
Solution: use withTranslation() i18next helper
Since 2019, when React Hooks were introduced, the process of creating new applications has been very easy and developer-friendly. There are multiple benefits of having hooks, including better code readability and reusability. Also, it is easier to create and introduce unit and integration tests.
I18next for React is a library for translating your application. It has all the needed features to prepare a multilanguage app: it is easy to use, it features active plugin maintenance on GitHub, extended documentation and is a part of the i18next ecosystem (translating network).
Using hooks
I18next for React was originally designed to use hooks and it’s doing it really well. More info about the project setup and the example of use can be found in the official plugin documentation: https://react.i18next.com/latest/usetranslation-hook
Use of Next I18next in Class component
What about class components, which are the old React standard? Can we still use next i18next in Class Components? The answer is yes. We can even have some components using hooks and other being Classes. All of them can still use this mechanism for translation.
Let’s have a look at an example of adding i18next to the React Class component. Here is a step by step tutorial.
Install dependencies
We need the main library to be added to the project by the NPM package. After executing this command, proper items will be added to package.json:
npm install react-i18next i18next –save
Configure i18next
Put configuration files in the src/i18n directory. The I18next React config.js file includes basic settings, and the localization strings are stored in translations.json
// src/i18n/config.js
import i18n from 'i18next';
import { initReactI18next } from 'react-i18next';
i18n.use(initReactI18next).init({
    fallbackLng: 'en',
    lng: 'en',
    resources: {
        en: {
            translations: require('./locales/en/translations.json')
        },
    },
    ns: ['translations'],
    defaultNS: 'translations'
});
i18n.languages = ['en'];
export default i18n;
An example translation file for the EN language is located in src/i18n/locales/en/translations.json
{
  "welcome": "Hello",
  "nice-to-see": "Nice to see you!"
}
Adding import to Index
To finish configuration, we need to import the config file directly in our index.jsx file:
// src/index.jsx
import React from 'react';
import ReactDOM from 'react-dom';
import './index.css';
import App from './App';
import reportWebVitals from './reportWebVitals';
import './i18n/config';
ReactDOM.render(
  <React.StrictMode>
    <App />
  </React.StrictMode>,
  document.getElementById('root')
);
// If you want to start measuring performance in your app, pass a function
// to log results (for example: reportWebVitals(console.log))
// or send to an analytics endpoint. Learn more: https://bit.ly/CRA-vitals
reportWebVitals();
Translation with React I18next in Class
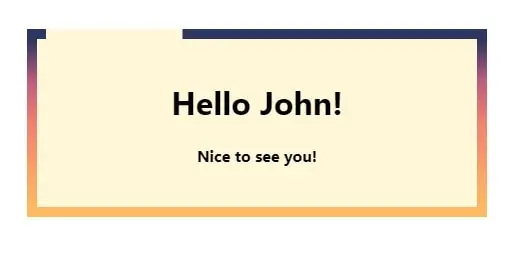
We have a simple Class Component that says Hello. The trick to enable i18next access to the component is to export it with withTranslation() . The displaying of translations is handled by using the .json key and this.props.t parameter. Here is an example: {this.props.t(‘nice-to-see’)}
// src/Welcome.jsx
// Component class - using i18next in React
import React from 'react';
import { withTranslation } from 'react-i18next';
class Welcome extends React.Component {
    render() {
        return (
            <>
                <h1>{this.props.t('welcome')} {this.props.name}!</h1>
                <h4>{this.props.t('nice-to-see')}</h4>
            </>
        )
    }
}
export default withTranslation()(Welcome);
To check if it’s working, let’s render the component in our application:
// src/App.jsx
import React from 'react';
import './App.css';
import Welcome from "./Welcome";
function App() {
  return (
    <div className="App">
      <Welcome name={'John'} />
    </div>
  );
}
export default App;
And application styles:
.App {
  max-width:400px;
  margin:30px auto;
  padding:20px;
  text-align: center;
  background: #ffd73e33;
  border:10px solid black;
  border-image: url("data:image/svg+xml;charset=utf-8,%3Csvg width='100' height='100' viewBox='0 0 100 100' fill='none' xmlns='http://www.w3.org/2000/svg'%3E %3Cstyle%3Epath%7Banimation:stroke 5s infinite linear%3B%7D%40keyframes stroke%7Bto%7Bstroke-dashoffset:776%3B%7D%7D%3C/style%3E%3ClinearGradient id='g' x1='0%25' y1='0%25' x2='0%25' y2='100%25'%3E%3Cstop offset='0%25' stop-color='%232d3561' /%3E%3Cstop offset='25%25' stop-color='%23c05c7e' /%3E%3Cstop offset='50%25' stop-color='%23f3826f' /%3E%3Cstop offset='100%25' stop-color='%23ffb961' /%3E%3C/linearGradient%3E %3Cpath d='M1.5 1.5 l97 0l0 97l-97 0 l0 -97' stroke-linecap='square' stroke='url(%23g)' stroke-width='3' stroke-dasharray='388'/%3E %3C/svg%3E") 1;
}
The demo’s border effect was inspired by: https://codepen.io/Mamboleoo/pen/zYOJOGb
That’s it for today’s tutorial. Make sure to follow us for other tips and guidelines, and don’t forget to subscribe to our newsletter.


![How to Fight AI Hallucinations About Your Brand [ready-to-use prompt inside]](https://www.createit.com/wp-content/uploads/2026/02/How-to-Fight-AI-Hallucinations-355x200.jpg)


