WP admin custom forms – how to display errors?

Do you use add_menu_page add_submenu_page in your plugin and have custom forms placed in the WordPress Dashboard Area? Having trouble in displaying form errors / success messages? In this article you will find a solution.
Admin form custom $_GET param
Let’s imagine we are authors of a WordPress plugin, and we would like to add a custom form in the Admin area. The form will provide an option to edit plugin settings. A typical solution will be:
- To create a custom admin page using add_menu_page or add_submenu_page
- To add a form with an action url being admin-post.php
- To use hidden input redirectToUrl to set a destination page (where to redirect after submit)
- On form submit – get $_POST data and save it in the database
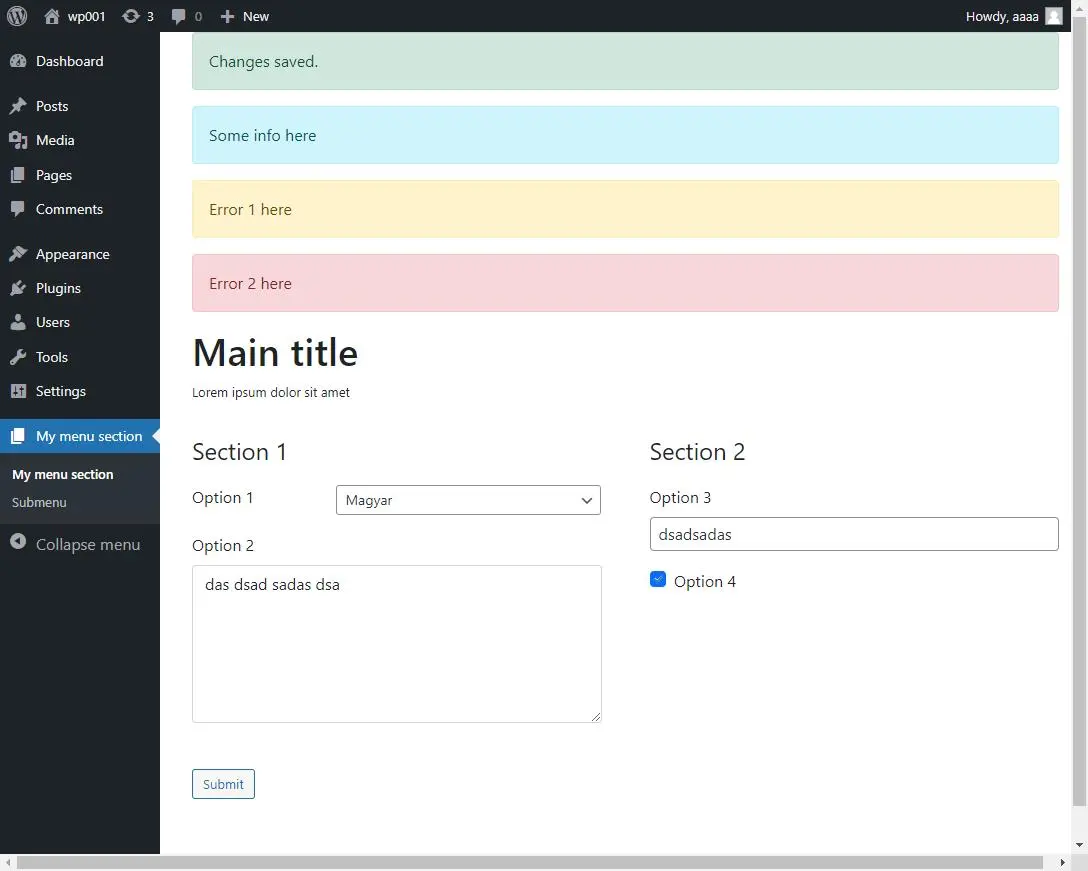
- To display form success / or form errors above the form
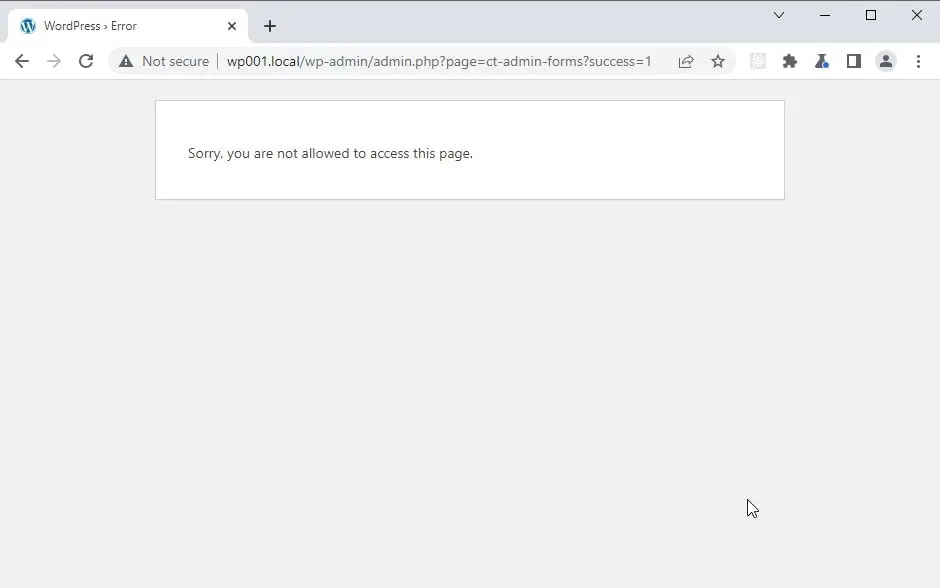
The form will be placed in the admin area, using menu_page url : /wp-admin/admin.php?page=ct-admin-forms . A popular solution for passing some data after submission is to append $_GET params to the url, example: /wp-admin/admin.php?page=ct-admin-forms?success=1 and use the success param to display the success message.
However, this will not work in this situation. WordPress is validating all parameters on admin requests and will block access to it by displaying: Sorry, you are not allowed to access this page.
Wp form submit – custom error message
The solution will be to save the error message in the database using the set_transient() WordPress core function. The error message will be stored in the database for 30 seconds. After validation and redirecting to the form, we will use get_transient() to get and display the proper message.
Now let’s put everything together and see a working example! Here is the registration of a new custom admin page:
add_action('admin_menu',  'ct_add_menu_page', 20);
function ct_add_menu_page()
{
    add_menu_page(
        esc_html__('My menu section', 'ct-admin'),
        esc_html__('My menu section', 'ct-admin'),
        'manage_options',
        'ct-admin-forms',
        function () {
            include dirname(__FILE__) . '/inc/view0.php';
        },
        'dashicons-admin-page'
    );
}
Custom admin form template:
<?php
// /inc/view0.php
?>
<h1><?php echo esc_html__('WP Admin custom form', 'ct-admin'); ?></h1>
<?php include dirname(__FILE__) . '/inc/alerts.php'; ?>
<form method="POST" action="<?php echo esc_html(admin_url('admin-post.php')); ?>">
    <input type="hidden" name="action" value="ct_admin_save">
    <?php wp_nonce_field('ct_admin_save', 'ct_admin'); ?>
    <input type="hidden" name="redirectToUrl" value="<?php echo admin_url('admin.php?page=ct-admin-forms') ?>">
    <?php
    /**
     * SOME FORM ELEMENTS HERE
     */
    ?>
    <div class="form__submit">
        <p class="submit">
            <input type="submit" name="submit5" id="submit5" class="button" value="Submit">
        </p>
    </div>
</form>
add_settings_error as transient
The function for validating the form and saving $_POST data in the database. Before redirecting, we’re saving the error message as transient. ct_save_data_in_database() is just an imaginary function that is saving options to the wp_options table. In case of an error, it is returning an array of errors. Make sure to apply your logic there.
add_action('admin_post_ct_admin_save','ct_submit_save');
public function ct_submit_save()
{
    /**
     * validate Nonce and user permissions
     */
    /**
     * save data to Database
     */
    $errors = ct_save_data_in_database();
    /**
     * save error message as transient and redirect
     */
    $redirect_to = $_POST['redirectToUrl'];
    if ($redirect_to) {
        if(empty($errors)){
            add_settings_error('ct_msg', 'ct_msg_option', __("Changes saved."), 'success');
        } else {
            add_settings_error('ct_msg', 'ct_msg_option', __("Unable to Submit Form: Please Try Again."), 'warning');
        }
        set_transient('settings_errors', get_settings_errors(), 30);
        wp_safe_redirect($redirect_to);
        exit;
    }
}
The last piece of the puzzle, a template for displaying errors. On page load, we’re deleting the transient that stores error messages.
<?php
/**
 * Display alerts after submitting custom admin wp form
 */
// /inc/alerts.php
function ct_admin_message($message, $msg_type = 'info') {
    return "<div id='message' class='alert alert-$msg_type'>$message</div>";
}
$form_errors = get_transient("settings_errors");
delete_transient("settings_errors");
if(!empty($form_errors)){
    foreach($form_errors as $error){
        echo ct_admin_message($error['message'], $error['type']);
    }
}
Types of alert messages
We can add multiple errors and configure the type of message: success, info, warning or danger. For styling, we’re using the Bootstrap HTML markup (having bootstrap.css style enqueued, you will see alerts already styled).
add_settings_error('ct_msg', 'ct_msg_option', __("Changes saved."), 'success');
add_settings_error('ct_msg', 'ct_msg_option', __("Some info here"), 'info');
add_settings_error('ct_msg', 'ct_msg_option', __("Error 1 here"), 'warning');
add_settings_error('ct_msg', 'ct_msg_option', __("Error 2 here"), 'danger');
That’s it for today’s tutorial. Be sure to follow us for other tips and guidelines, and don’t forget to subscribe to our newsletter.


![How to Fight AI Hallucinations About Your Brand [ready-to-use prompt inside]](https://www.createit.com/wp-content/uploads/2026/02/How-to-Fight-AI-Hallucinations-355x200.jpg)


