Fetch user IP with fallback in React

To fetch user IP in React we need to connect to external service providers that will return a proper value. In the case when the first server is not responding, we’ve prepared fallback that will try to connect to a different server. That way we are ready for a situation when one of the servers has downtime.
Get user info
The GetUserInfo component will connect to https://ipv4.icanhazip.com to get the IP address. If the connection fails or the response is slower than 5 seconds, we will connect service 2: https://api.ipify.org .
There is also a waitTime prop that can be used to delay the initial connection.
The Main React component source code:
// App.tsx
import React, { useEffect, useState } from "react";
import './App.css';
import publicIp from './publicIp.js';
const GetUserInfo = (props: any) => {
const {waitTime} = props;
const [userIpAddress, setUserIpAddress] = useState('');
const divStyle = {
fontSize: '2rem',
textAlign: 'center' as const,
padding: 20,
border: '1px solid red',
maxWidth: 400,
margin: '20px auto'
};
useEffect(() => {
if (!userIpAddress) {
setTimeout(function(){
getIp();
}, 1000 * waitTime)
}
});
const getIp = () => {
publicIp.v4()
.then(
(result) => {
if(result){
setUserIpAddress(result);
}
},
(error) => {
console.log(error);
setUserIpAddress('0.0.0.0');
}
);
}
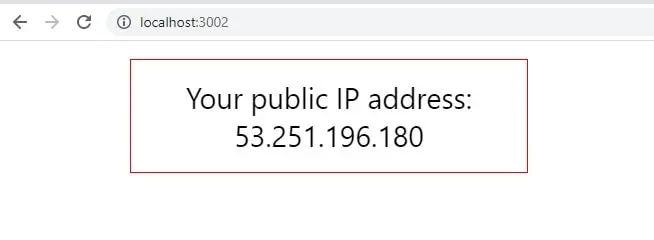
return (
<div style={divStyle}>
Your public IP address:
{!userIpAddress ? ' loading...': ' '}
{userIpAddress}
</div>
);
}
function App() {
return (
<div className="App">
<GetUserInfo waitTime={3} />
</div>
);
}
export default App;
Get user public IP in React
Thanks to Sindre Sorhus whose Node package ( https://github.com/sindresorhus/public-ip ) was the inspiration for this article. Using this npm package in React is not always possible (issues with the Babel compilation). Therefore, we’ve created standalone: publicIp.js that can be easily used in any React application.
// https://github.com/sindresorhus/public-ip/blob/main/browser.js
// publicIp.js
import ipRegex from 'ip-regex';
export class CancelError extends Error {
    constructor() {
        super('Request was cancelled');
        this.name = 'CancelError';
    }
    get isCanceled() {
        return true;
    }
}
export class IpNotFoundError extends Error {
    constructor(options) {
        super('Could not get the public IP address', options);
        this.name = 'IpNotFoundError';
    }
}
const defaults = {
    timeout: 5000,
};
const urls = {
    v4: [
        'https://ipv4.icanhazip.com/',
        'https://api.ipify.org/',
    ],
    v6: [
        'https://ipv6.icanhazip.com/',
        'https://api6.ipify.org/',
    ],
};
const sendXhr = (url, options, version) => {
    function isIP(string, version = 'v4') {
        if(version === 'v4'){
            return ipRegex.v4({exact: true}).test(string);
        }
        if(version === 'v6'){
            return ipRegex.v6({exact: true}).test(string);
        }
        return ipRegex({exact: true}).test(string);
    }
    const xhr = new XMLHttpRequest();
    let _reject;
    const promise = new Promise((resolve, reject) => {
        _reject = reject;
        xhr.addEventListener('error', reject, {once: true});
        xhr.addEventListener('timeout', reject, {once: true});
        xhr.addEventListener('load', () => {
            const ip = xhr.responseText.trim();
            if (!ip || !isIP(ip, version)) {
                reject();
                return;
            }
            resolve(ip);
        }, {once: true});
        xhr.open('GET', url);
        xhr.timeout = options.timeout;
        xhr.send();
    });
    promise.cancel = () => {
        xhr.abort();
        _reject(new CancelError());
    };
    return promise;
};
const queryHttps = (version, options) => {
    let request;
    const promise = (async function () {
        const urls_ = [
            ...urls[version],
            ...(options.fallbackUrls ?? []),
        ];
        let lastError;
        for (const url of urls_) {
            try {
                request = sendXhr(url, options, version);
                // eslint-disable-next-line no-await-in-loop
                const ip = await request;
                return ip;
            } catch (error) {
                lastError = error;
                if (error instanceof CancelError) {
                    throw error;
                }
            }
        }
        throw new IpNotFoundError({cause: lastError});
    })();
    promise.cancel = () => {
        request.cancel();
    };
    return promise;
};
const publicIp = {};
publicIp.v4 = options => queryHttps('v4', {...defaults, ...options});
publicIp.v6 = options => queryHttps('v6', {...defaults, ...options});
export default publicIp;
Run application
The last step is to add the ip-regex dependency to validate if fetched response is valid.
npm install ip-regexNow you can start the application:
npm startAdditional note:
The example application was created using create-react-app:
npx create-react-app my-app --template typescriptThat’s it for today’s tutorial. Be sure to follow us for other useful tips and guidelines – sign up for our newsletter to stay up to date.


![How to Fight AI Hallucinations About Your Brand [ready-to-use prompt inside]](https://www.createit.com/wp-content/uploads/2026/02/How-to-Fight-AI-Hallucinations-355x200.jpg)


