Sendbird chat customization in React

Sendbird’s chat, APIs and SDKs are used by developers to build chat functionality. If you’re building a chat in your app or chatbot that will answer questions in an ecommerce shop, Sendbird provides tools to make it happen.
Basic Chat in React
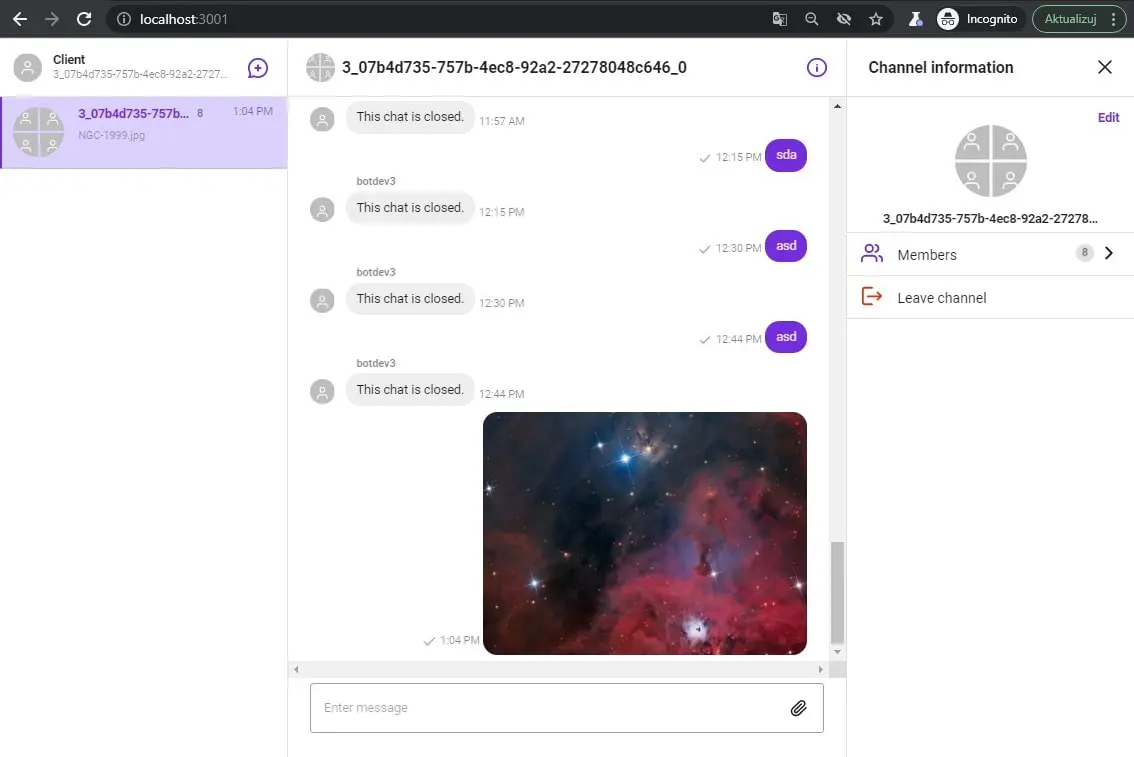
Let’s start with something really simple, using the built-in UIKit features. The implementation here is simple, but the chat itself is quite advanced: Message threading, channel list, typing indicator, emoticons reactions, copy/edit/delete message, leaving chat, creating a new group chat, editing channel information meta-data, delivered message icon or sending a file, adding buttons.
The first step will be to install the npm package:
npm install sendbird-uikit
The main app source code:
// App.jsx
import React from 'react';
import './App.css';
import { App as SendBirdApp } from "sendbird-uikit";
import "sendbird-uikit/dist/index.css";
const App = () => {
  return (
      <div className="App" style={{"height":"100%"}}>
        <SendBirdApp
            appId="XXX"
            userId="YYY"
        />
      </div>
  );
};
export default App;
Make sure to provide a real appId and userId. Without them, the chat wouldn’t be able to connect to SendBird API. The last step will be to make chat 100% browser height:
body, html, #root {
  height:100%;
}
That’s it, we now have a fully functional chat with a lot of interesting features!
Customize or not?
SendBird UIKit provides an option to customize the rendering of basic elements. In a situation when a custom view needs to be prepared, it is really handy. One thing that is worth mentioning is that the overwritten element will lose all the nice “default” features that are built-in.
If you decide to overwrite the component, you will probably need to implement all those features by yourself. Sometimes, it is better to use only CSS styles to apply a new design or color changes. In the case of more advanced changes, a component override will probably be needed.
SB Chat Customization
We’re going to create render views for the chat header, channel list, message thread and message input. The default components will be overwritten by our custom ones. We will have full control over what is happening inside the component and we can apply our HTML code structure. Make sure to change the APP_ID, USER_ID and CHANNEL_URL variables.
// App.jsx
import React from 'react';
import './App.css';
import {
    SendBirdProvider,
    Channel,
    ChannelList
} from 'sendbird-uikit';
import "sendbird-uikit/dist/index.css";
import {MyCustomChatMessage} from "./MyCustomChatMessage";
import CustomizedMessageInput from "./CustomizedMessageInput";
import {CustomizedHeader} from "./CustomizedHeader";
import {MyCustomChannelPreview} from "./ChannelPreview";
const APP_ID = "AAA";
const USER_ID = "BBB";
const CHANNEL_URL = "CCC";
const App = () => {
    return (
        <div style={{ height: '100vh' }} className={"mainWrapper"}>
            <SendBirdProvider
                theme="light"
                appId={APP_ID}
                userId={USER_ID}
            >
                <div className="sendbird-app__wrap">
                    <div className="sendbird-app__conversation-wrap">
                        <div>
                            <ChannelList renderChannelPreview={MyCustomChannelPreview}
                                 onChannelSelect={(channel) => { console.warn(channel); }}
                            />
                        </div>
                        <Channel
                            channelUrl={CHANNEL_URL}
                            renderChatItem={({ message, onDeleteMessage, onUpdateMessage }) => (
                                <MyCustomChatMessage
                                    message={message}
                                    onDeleteMessage={onDeleteMessage}
                                    onUpdateMessage={onUpdateMessage}
                                />
                            )}
                            renderMessageInput={({ channel, user, disabled }) => (
                                <CustomizedMessageInput
                                    channel={channel}
                                    user={user}
                                />
                            )}
                            renderChatHeader={({ channel, user }) => (
                                <CustomizedHeader
                                    userId={user}
                                    channel={channel}
                                />
                            )}
                        />
                    </div>
                </div>
            </SendBirdProvider>
        </div>
    );
};
export default App;
The custom view for messages:
// MyCustomChatMessage.jsx
import React from 'react';
export const MyCustomChatMessage = (props) => {
    const { message, onDeleteMessage, onUpdateMessage } = props;
    console.log("rendering");
    return (
        <div className={(message.customType ? "type--" + message.customType : '')+ ' customizedMessage'}>
            <div className="customizedMessage_content">
                { message.messageType === 'file'
                    ? (
                        <div className="img-fluid">
                            <img
                                className="img-fluid"
                                src={message.url}
                                alt={message.name}
                            />
                        </div>
                    ) :
                    (
                        <>
                            {message.message}
                        </>
                    )
                }
            </div>
            <div className="customizedMessage_author">
                {` by
                    ${message.messageType === 'admin'
                    ? 'Channel Admin'
                    : message.sender && message.sender.userId}
                `}
            </div>
            <hr/>
        </div>
    );
};
The custom view for chat header:
// CustomizedHeader.jsx
import React, { useMemo } from "react";
export const CustomizedHeader = (props) => {
    const { channel } = props;
    const channelName = channel.name;
    const channelAvatar = useMemo(() => {
        if (channel.coverUrl) {
            return <img src={channel.coverUrl} style={{width:'100px'}} />;
        }
        return (
            <></>
        );
    }, [channel]);
    const channelTitle = useMemo(() => {
        if (channelName) {
            return channelName;
        }
    }, [channelName]);
    return (
        <div className="customizedHeaderWrapper">
            <div>
                {channelAvatar}
            </div>
            <div>
                {channelTitle}
            </div>
        </div>
    );
}
The custom view for message text area and send message:
// CustomizedMessageInput.jsx
import React, { useState } from "react";
import { sendBirdSelectors, withSendBird } from "sendbird-uikit";
function CustomizedMessageInput(props) {
    // props
    const {
        channel,
        disabled,
        // from mapStoreToProps
        sendUserMessage,
        sendFileMessage,
        sdk,
    } = props;
    // state
    const [inputText, setInputText] = useState("");
    const [isShiftPressed, setIsShiftPressed] = useState(false);
    // event handler
    const handleChange = event => {
        setInputText(event.target.value);
    };
    const KeyCode = {
        SHIFT: 16,
        ENTER: 13,
    };
    const sendUserMessage_ = event => {
        if(!inputText){
            return;
        }
        const params = new sdk.UserMessageParams();
        params.message = inputText;
        sendUserMessage(channel.url, params)
            .then(message => {
                console.log(message);
                setInputText("");
            })
            .catch(error => {
                console.log(error.message);
            });
    };
    return (
        <div className="customized-message-input">
            <div id="customized-message-input-wrapper">
                <textarea
                    id="customized-message-input"
                    type="txt"
                    value={inputText}
                    onChange={handleChange}
                    onKeyDown={(e) => {
                        if (e.keyCode === KeyCode.SHIFT) {
                            setIsShiftPressed(true);
                        }
                        if (!isShiftPressed && e.keyCode === KeyCode.ENTER) {
                            e.preventDefault();
                            sendUserMessage_();
                        }
                    }}
                    onKeyUp={(e) => {
                        if (e.keyCode === KeyCode.SHIFT) {
                            setIsShiftPressed(false);
                        }
                    }}
                />
                <button
                    onClick={sendUserMessage_}
                >
                   Send message
                </button>
            </div>
        </div>
    );
}
const mapStoreToProps = store => {
    const sendUserMessage = sendBirdSelectors.getSendUserMessage(store);
    const sdk = sendBirdSelectors.getSdk(store);
    const sendFileMessage = sendBirdSelectors.getSendFileMessage(store);
    return {
        sendUserMessage,
        sdk,
        sendFileMessage
    };
};
export default withSendBird(CustomizedMessageInput, mapStoreToProps);
And finally, the channel list customization:
// ChannelPreview.jsx
export const MyCustomChannelPreview = ({ channel, onLeaveChannel }) => {
    return  (
        <div style={{ border: '1px solid gray' }}>
            <h3>{channel.name}</h3>
            <img height="20px" width="20px" src={channel.coverUrl} />
            <button onClick={() => {
                const callback = () => {
                    console.warn('Leave channel success')
                };
                onLeaveChannel(channel, callback);
            }}
            > Leave
            </button>
        </div>
    )
} ;
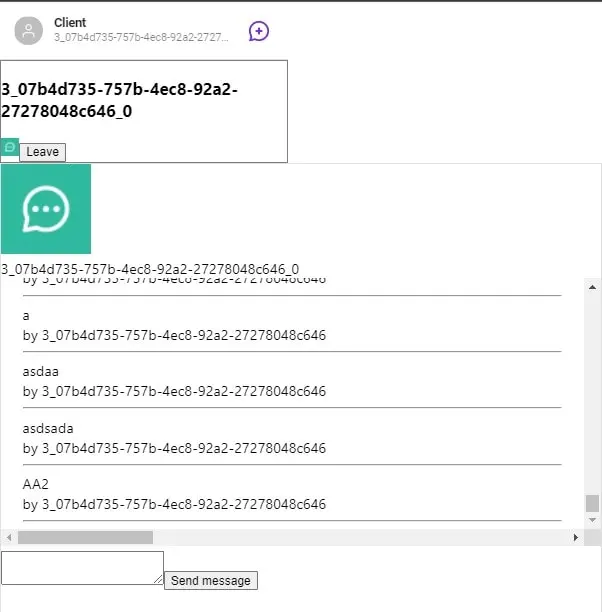
Customized chat demo
Now we have the ability to apply a custom HTML structure and advanced changes to SendBird chat elements. Without styles, the chat looks really raw, but functionality works fine. What is left is styling, but this is beyond the scope of this article.


![How to Fight AI Hallucinations About Your Brand [ready-to-use prompt inside]](https://www.createit.com/wp-content/uploads/2026/02/How-to-Fight-AI-Hallucinations-355x200.jpg)


