SSO login in WordPress
CHALLENGE: integrate WordPress with a third-party SSO login system
SOLUTION: prepare WP endpoint, verify data and authenticate a logged in user
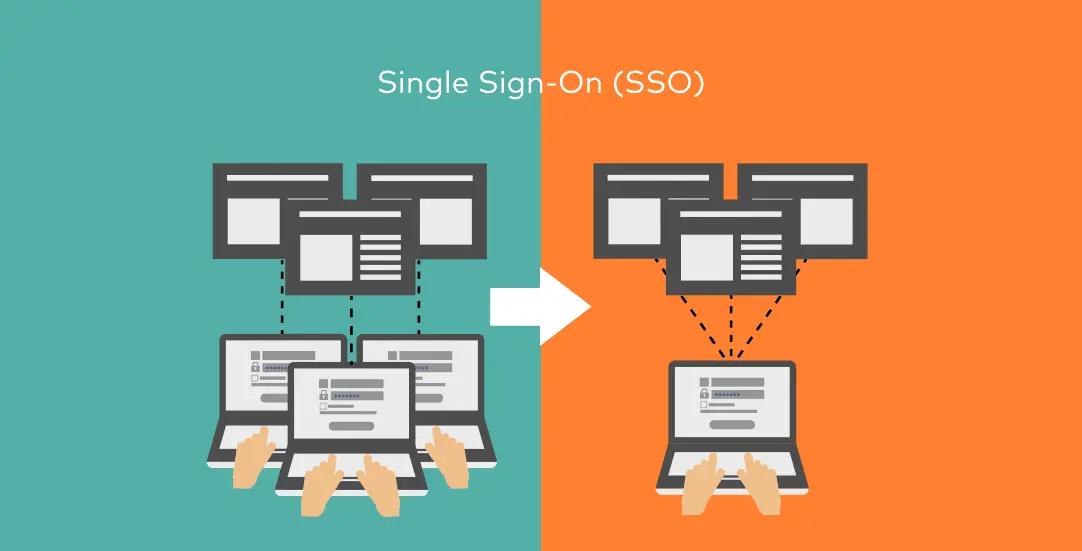
Single sign-on (SSO) is an authentication method that allows a user to login using a third-party “identity provider”. There are multiple benefits of using SSO. The user authenticates only in the “Central identity provider”, then user session is established and redirection is made to the WordPress website. Once logged in, authorization will be remembered without a need to fill in the credentials again.
Pros of using SSO
You can implement SSO for all company websites or systems. This will simplify user password management. Instead of remembering a separate login for each site, the user will authenticate in one place (Central identity provider). We can also force the user to use a strong password, which is good security practice. SSO reduces IT Support time spent in your organization: significantly fewer requests about “forgetting the password”, an easier way to disable user access when employee leaves the company. The cons of SSO will be: the time spent on creating SSO integration.
Social login
We can use our own ‘Identity provider’ System or rely on existing ones: FB, Google. We can add the ‘Log in via Facebook’ button or ‘Log in via Google’. After successful authentication, the user will be redirected to our WordPress website and the parameter secret token will be included in the request. We can use this token and ask for user details (like email, name, username, locale etc.). In this tutorial, we’re going to focus on integration with a custom identity provider (dedicated to our organization).
Third-party identity provider (IdP)
When creating a WordPress SSO login plugin, we’re going to use an imaginary identity provider service. More details are here:
- there is a central SSO server : https://account.identityprovider.com/login?returnurl=www.mywpsite.com/myendpoint
- after logging in – IdP will pass a secret_token and redirect to a “returnurl” address
- then, we can use secret_token and post a request to url: https://account.identityprovider.com/getUserDetails . As a response, we will get user details as json
- Example of getUserDetails response:
{
    "address": "Lorem ipsum",
    "country": "USA",
    "email": "john@example.com",
    "firstName": "John",
    "id": "1394",
    "isActive": true,
    "lastName": "Doe",
    "username": "john123"
}
SSO WP login plugin
Our simple WordPress plugin will connect to third-party IdP and get user details. If a WordPress user account does not exist, create a new one. Save user details as user-meta. At the end, auto-log in WordPress user.
WP Endpoint
We’re going to create WordPress Endpoint to handle responses from SSO. Endpoint path (url) needs to be set as returnurl param. You can add the following button to you website: “Log in using SSO”, the proper href value should be: https://account.identityprovider.com/login?returnurl=www.mywpsite.com/ct_sso/v1/token
add_action( 'rest_api_init', array( $this, 'addApiEndpoint') );
public function addApiEndpoint() {
    $success = register_rest_route( 'mysso/v1', '/token', array(
        'methods' => WP_REST_Server::CREATABLE,
        'callback' => array($this, 'handleTokenRequest'),
    ) );
    if( ! $success ) {
        return wp_die('Couldn\'t create rest endpoint');
    }
}
public function handleTokenRequest( $request ) {
    $token = $request->get_body_params()['secret_token'];
    if( empty($token) ) {
        wp_die('Couldn\'t find token in request');
    }
    $userDetails = $this->getDataFromApi($token);
    $this->authenticateUser($userDetails);
    wp_safe_redirect( home_url() );
    exit();
}
Get user details
After successfully logging in, handleTokenRequest method will be triggered. We will get secret_token value that should be used to get user details.
public function getDataFromApi( $token )
{
    $url = 'https://account.identityprovider.com/getUserDetails';
    // post for user data with secret_token received from api
    $res = wp_remote_post(
        $url,
        array(
            'body' => array( 'secret_token' => $token )
        )
    );
    if( is_wp_error( $res ) ) {
        wp_die( $res->get_error_messages() );
    }
    $body = wp_remote_retrieve_body($res);
    $decodedBody = json_decode($body, true);
    if (!empty($decodedBody)) {
        return $decodedBody;
    } else {
       wp_die('No data in response from API');
    }
}
Log in to WordPress
Now we have authenticated the user and his details. We can log him in as a WordPress user to our website. If this is his first log in, a WordPress user account needs to be created.
public function authenticateUser($decodedBody)
{
    // find if user from api exist in WordPress
    $user = get_user_by('email', $decodedBody['email']);
    // create new user if didn't find correct one
    if (empty($user)) {
        $newUserID = $this->createUser($decodedBody);
        $user = get_user_by('ID', $newUserID);
    }
    //check if not admin account
    else if( in_array("administrator", $user->roles) ) {
        wp_die('Admins can\'t login through SSO');
    }
    $this->updateUser($user, $decodedBody);

    wp_clear_auth_cookie();
    wp_set_current_user($user->ID, $user->user_login);
    wp_set_auth_cookie($user->ID);
}
public function createUser($data) {
    $userdata = array(
        'user_login'    =>      $data['username'],
        'user_email'    =>      $data['email'],
        'display_name'  =>      $data['firstName'] . ' ' . $data['lastName'],
        'first_name'    =>      $data['firstName'],
        'last_name'     =>      $data['lastName'],
        'user_pass'     =>      wp_generate_password(),
        'role'          =>      'subscriber',
    );
    $newUserID = wp_insert_user($userdata);
    //return error if user didn't created
    if( is_wp_error( $newUserID ) ) {
        wp_die( print_r( $newUserID->get_error_messages() ) );
    }
    // save other SSO fields as user-meta
   $this->updateUserMeta($newUserID, $data);

 return $newUserID;
}
Next steps
The Secure Sign On plugin for WordPress now works. We can extend it by adding new features: use different user roles, create various user permissions based on user meta details, set WordPress session lifetime or integrate WP with multiple IdPs.
This concludes today’s tutorial. Make sure you follow us for other useful tips and guidelines.


![How to Fight AI Hallucinations About Your Brand [ready-to-use prompt inside]](https://www.createit.com/wp-content/uploads/2026/02/How-to-Fight-AI-Hallucinations-355x200.jpg)


