Headless chrome – testing webgl using playwright

Challenge: capture WEBGL screenshots with 60fps performance
Solution: use playwright for WebGL tests and configure chromium flags
End-to-end tests involve writing scenarios that will be triggered by pipeline, or occasionally by cron. Animations are difficult to test, especially technologies like Canvas and webGL. Capturing all frames can be challenging.
We have webgl animations that require the GPU to achieve good performance. A smooth WebGL animation should run at 60 frames per second.
Our e2e tests will visit a website with webgl animation, take a screenshot and save it as a .png file. We will try with different playwright settings and check the results.

Testing scenario
The demo scenario is simple – visit three urls and take screenshots. The first url: chrome://gpu/ to check if Chrome has the “Hardware accelerated” option enabled. The second url: https://www.soft8soft.com/webglreport to debug webgl browser settings and finally the third url: https://webglsamples.org/aquarium/aquarium.html with animation.
The expected results: GPU hardware acceleration enabled and smooth animation with 60 frames per second.
Playwright WebGL script
Tests written in Playwright are cross-browser, each one has a separate browser context which means full test isolation and zero overhead. Tests are fast to execute, can be launched in headless mode. The framework was created by Microsoft and released in January 2020. Since then, it has been expanding and becoming really popular.
Here is our test written in Javascript (Playwright 1.27.1):
// tests/example1.test.js
const { test, expect } = require('@playwright/test');
function waitFor(delay) {
    return new Promise(resolve => setTimeout(resolve, delay));
}
const currentTime = Date.now();
const url1 = "chrome://gpu/";
const url2 = "https://www.soft8soft.com/webglreport";
const url3 = "https://webglsamples.org/aquarium/aquarium.html";
test.beforeEach(async ({ page }, testInfo) => {
    testInfo.setTimeout(testInfo.timeout + 160000);
});
test.describe('Testing 123', () => {
    // Check if hardware acceleration is enabled. Without it, our tests will be much slower.
    test("1. GPU hardware acceleration", async ({ page }) => {
        await page.goto(url1);
        let featureStatusList = page.locator(".feature-status-list")
        await waitFor(2000);
        await page.screenshot({ path: 'screens/screenshot' + currentTime + '_1.png', fullPage: true });
        // await expect(featureStatusList).toContainText("Hardware accelerated")
    })
    test("2. webgl report", async ({ page }) => {
        await page.goto(url2)
        await waitFor(2000);
        await page.screenshot({ path: 'screens/screenshot' + currentTime + '_2.png', fullPage: true });
    })
    test("3. aquarium", async ({ page }) => {
        await page.goto(url3)
        await waitFor(5000);
        await page.screenshot({ path: 'screens/screenshot' + currentTime + '_3.png', fullPage: true });
    })
})
Playwright config
On the first try, we are going to run “Chrome Desktop” with headed mode and parallel tests’ execution. After running the test, you will see 3 browser instances (3 Windows) opened with tests executing.
Here is playwright.config.js with the basic configuration:
// playwright.config.js
// @ts-check
const { devices } = require('@playwright/test');
/**
 * @see https://playwright.dev/docs/test-configuration
 * @type {import('@playwright/test').PlaywrightTestConfig}
 */
const config = {
    testDir: './tests',
    timeout: 30 * 1000,
    expect: {
        /**
         * Maximum time expect() should wait for the condition to be met.
         * For example in `await expect(locator).toHaveText();`
         */
        timeout: 5000
    },
    fullyParallel: true,
    forbidOnly: !!process.env.CI,
    retries: process.env.CI ? 2 : 0,
    workers: process.env.CI ? 3 : undefined,
    reporter: 'html',
    use: {
        actionTimeout: 0,
        trace: 'on-first-retry',
    },
    /* Configure projects for major browsers */
    projects: [
        {
            name: 'chromium',
            use: {
                ...devices['Desktop Chrome'],
                headless: false,
                screenshot: 'on',
                video: 'on',
                launchOptions: {
                    // args: ["--headless","--no-sandbox","--use-angle=gl"]
                    args: ["--no-sandbox"]
                }
            },
        },
    ],
};
module.exports = config;
Playwright installation
The recent playwright library, version 1.27.1, is required to be installed. We have package.json :
{
  "name": "tests1",
  "version": "1.0.0",
  "main": "index.js",
  "directories": {
    "test": "tests"
  },
  "scripts": {},
  "keywords": [],
  "author": "",
  "license": "ISC",
  "devDependencies": {
    "@playwright/test": "1.27.1"
  }
}
To initialize the project (one time) we need to execute the following commands:
npm install
npx playwright install
Having this, we can run our tests using the following command:
npx playwright test example1 --reporter=htmlPlaywright results
In the console, we will see that our tests passed with success. Everything took 10 seconds to finish. Script output:
npx playwright test example1 --reporter=html
Running 3 tests using 3 workers
3 passed (10s)
To open last HTML report run:
npx playwright show-report
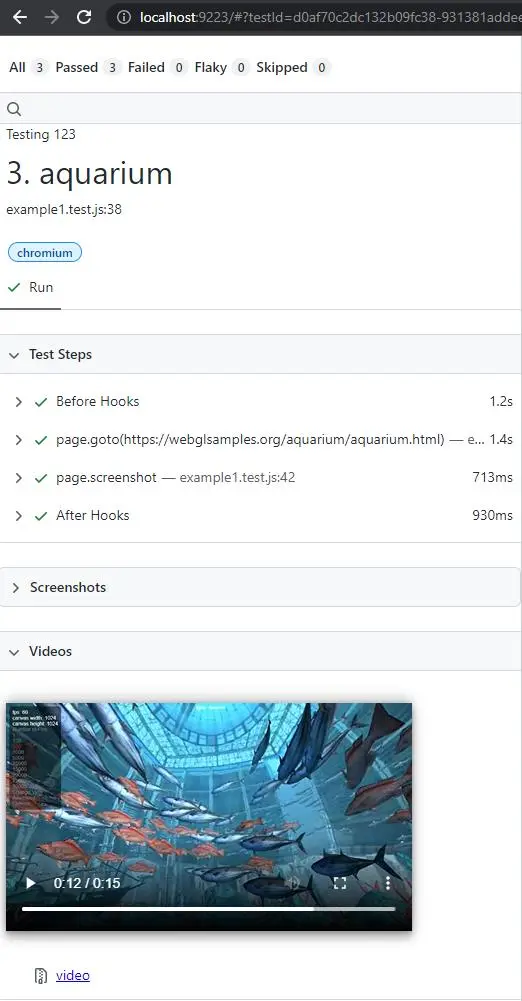
To see a detailed report with more information, we can execute:
npx playwright show-reportAs a result, we will see the timing of steps and the recorded video of the entire test:
Taking WebGL Playwright screenshots
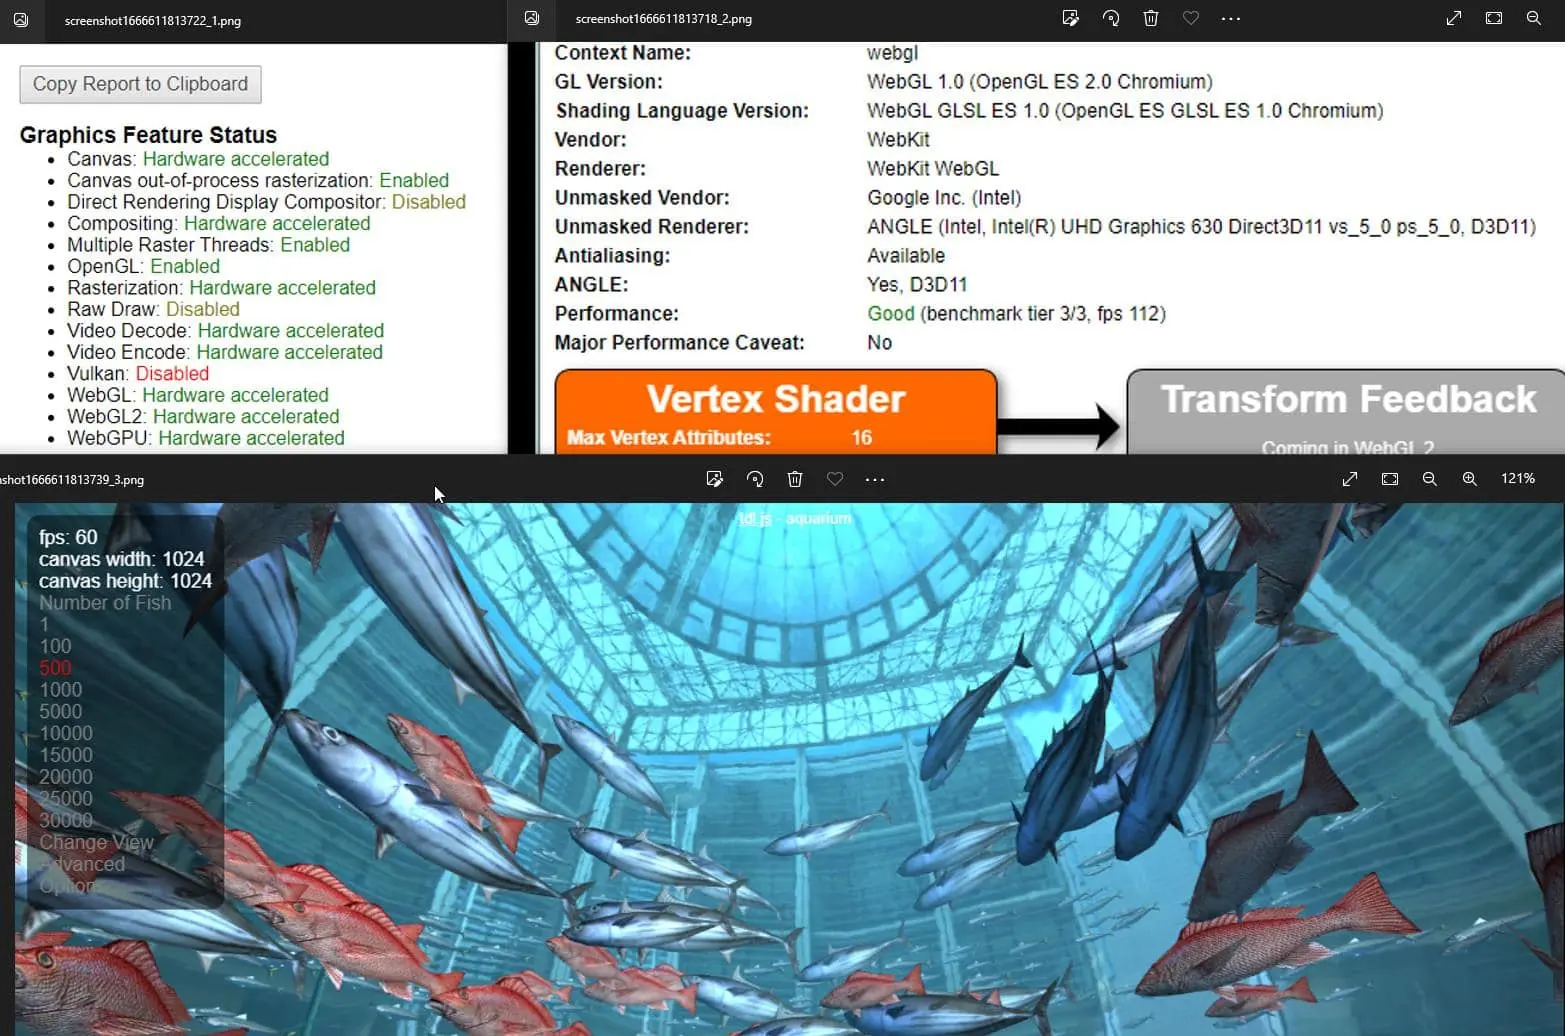
When writing Playwright tests you can decide to take a full page screenshot at any time. Our script executes:
await page.screenshot({ path: 'screens/screenshot' + currentTime + '_1.png', fullPage: true });The saved screenshots will be placed in the /screens/ directory. Here are 3 screenshots saved after running headed Chrome with GPU support enabled (Hardware acceleration):
Playwright Headless Chrome
We can configure our tests to run in headless mode. Headless Chrome runs without a user interface, with better memory utilization and improved performance. Other headless benefits are the ability to use it in pipelines for continuous integration like Jenkins, or to run tests using docker containers.
In simple words, in headless mode you will not see the browser window, but the page is still running.
To enable headless mode, we are going to edit the playwright.config.js file and set the headless param to true and add additional args for browser launch.
/* Configure projects for major browsers */
projects: [
    {
        name: 'chromium',
        use: {
            ...devices['Desktop Chrome'],
            headless: true,
            screenshot: 'on',
            video: 'on',
            launchOptions: {
                args: ["--headless","--no-sandbox","--use-angle=angle"]
                // args: ["--no-sandbox"]
            }
        },
    },
],
By default, the browser uses the ANGLE layer to render WebGL draw calls. To force headless chrome to use ANGLE, the important argument (args) is: –use-angle=angle,
Let’s run our tests:
npx playwright test example1 –reporter=listand see the results:
λ npx playwright test example1 --reporter=list
Running 3 tests using 3 workers
ok 1 [chromium] › example1.test.js:38:5 › Testing 123 › 3. aquarium (12s)
ok 2 [chromium] › example1.test.js:31:5 › Testing 123 › 2. webgl report (5s)
ok 3 [chromium] › example1.test.js:21:5 › Testing 123 › 1. GPU hardware acceleration (8s)
3 passed (13s)

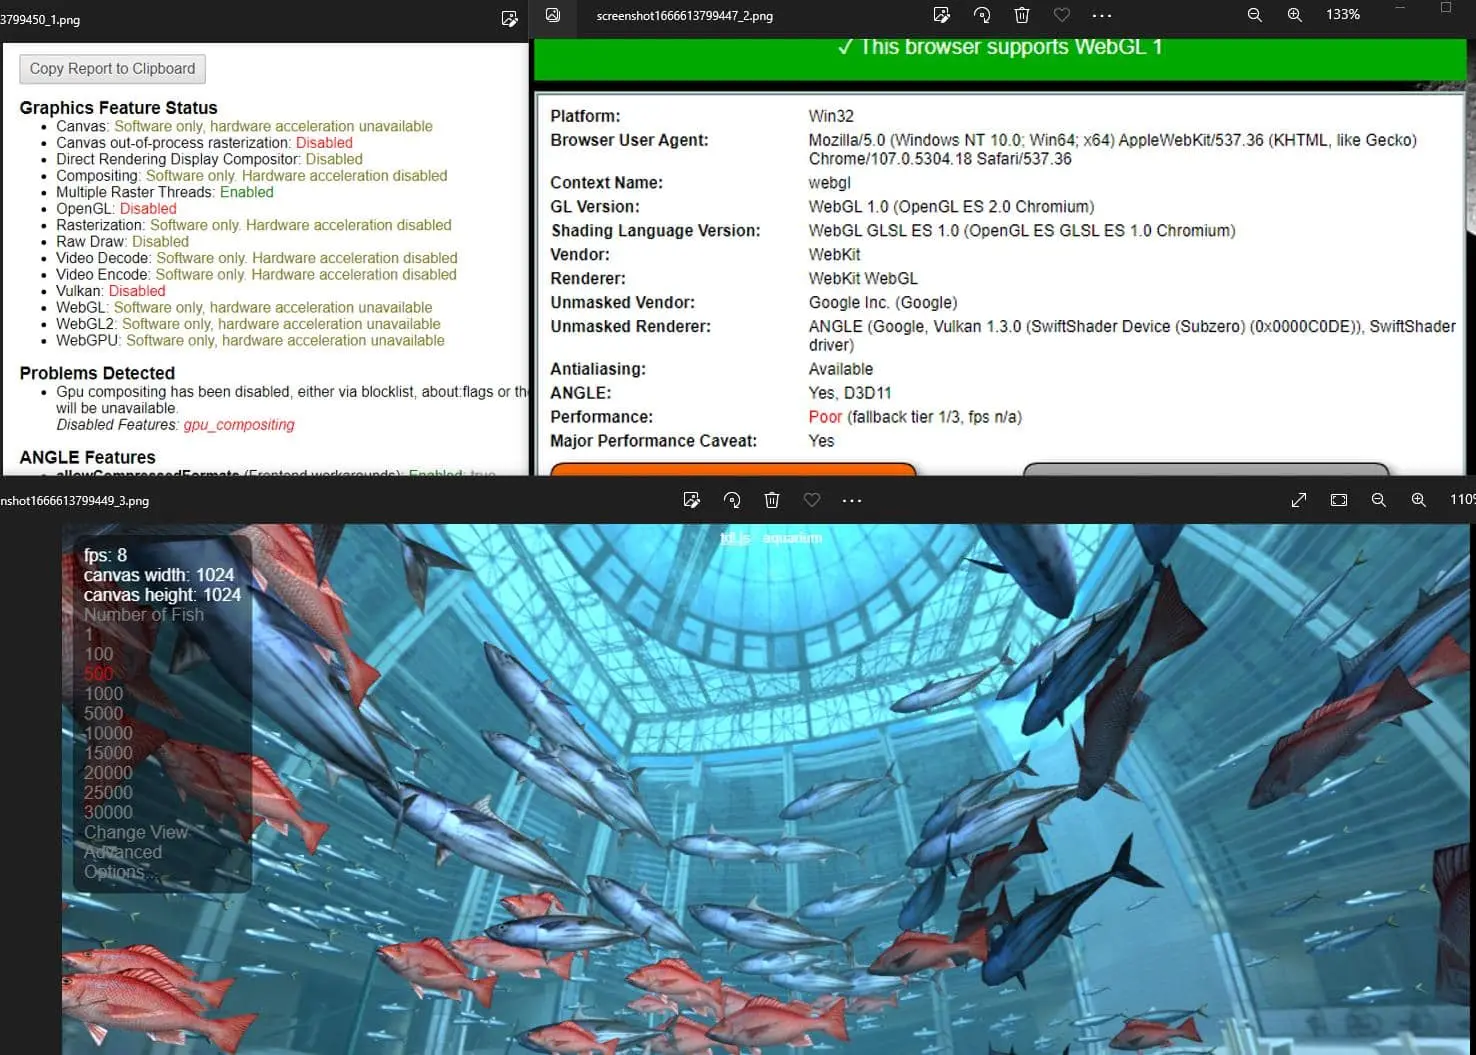
The results (screenshots) are not what we expected. Hardware acceleration is disabled and Webgl animation is lagging and shutters have only 8 fps. See the screenshots below:
Fix testing webgl to have 60 fps in headless Chrome
Headless Chrome in playwright can be forced to use Hardware Acceleration. Our machine runs Windows with the GPU model UHD Graphics 630 (D3D11). Let’s apply a minor playwright config change to enable GPU support for our tests.
We need to edit playwright.config.js and change one chrome flag. Now we will have:–use-angle=gl
// playwright.config.js
projects: [
    {
        name: 'chromium',
        use: {
            ...devices['Desktop Chrome'],
            headless: true,
            screenshot: 'on',
            video: 'on',
            launchOptions: {
                args: ["--headless","--no-sandbox","--use-angle=gl"]
                // args: ["--no-sandbox"]
            }
        },
    },
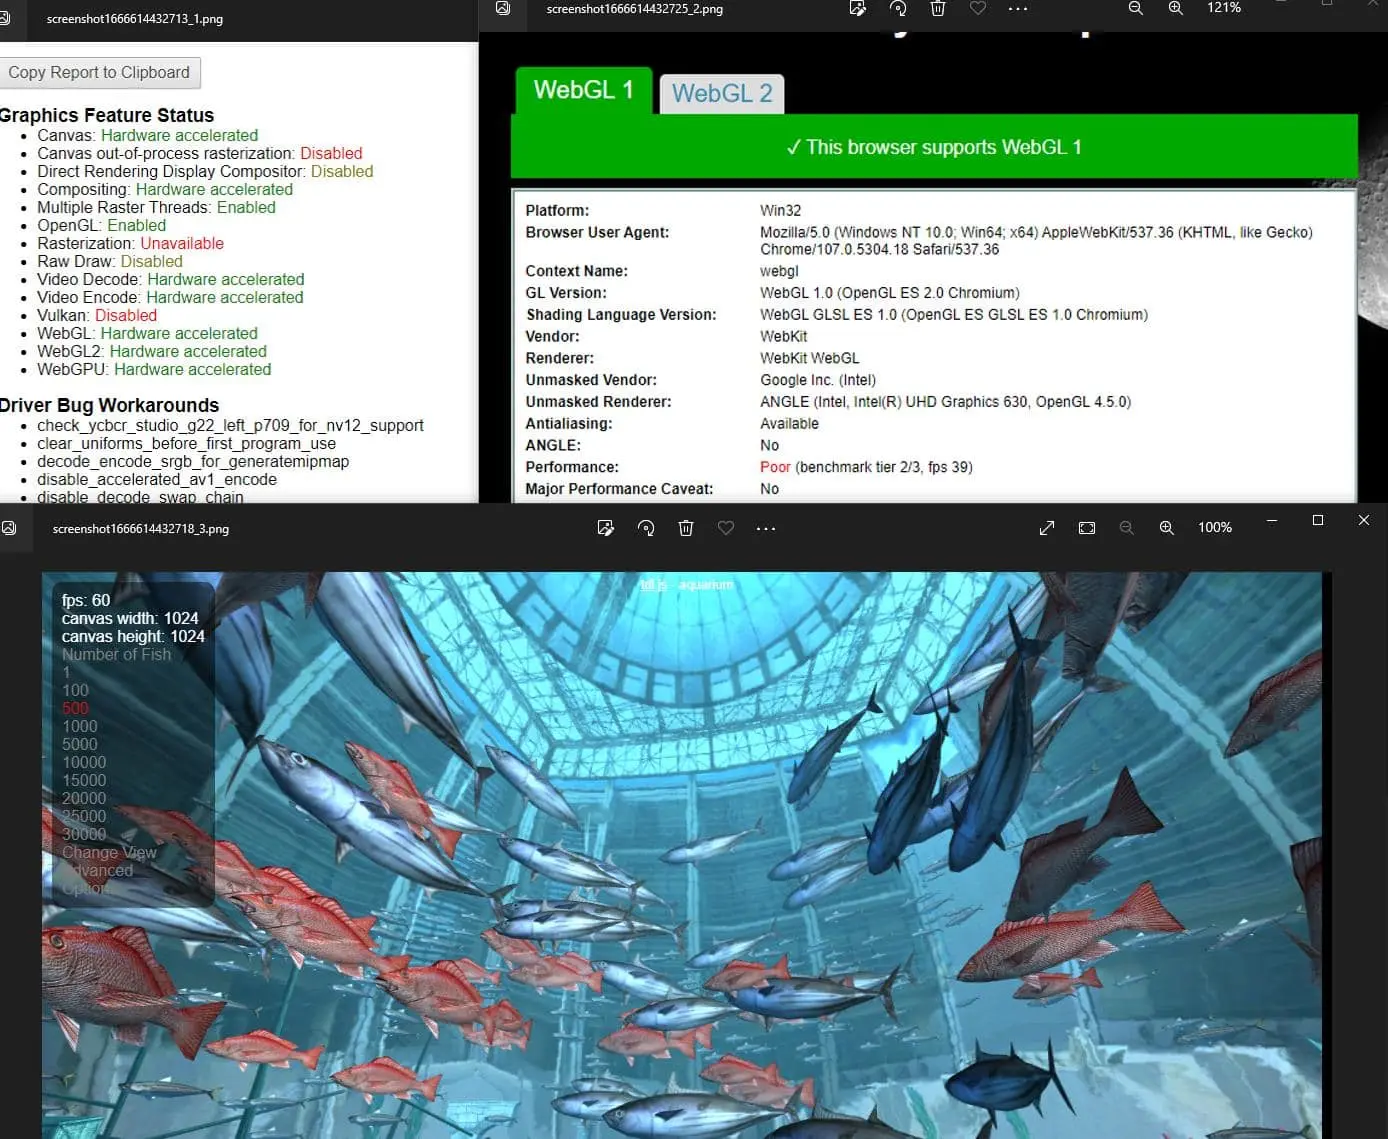
Success! Headless tests are executed in 12 seconds and screenshots prove that hardware acceleration is enabled. The Aquarium animation is smooth with 60FPS.
Docker with GPU support
Our script can use Docker to run. We need to remember that Docker does not utilize hardware acceleration by default. The solution for this is to use the NVIDIA Container Toolkit that allows users to build and run GPU accelerated Docker containers. More info: https://github.com/NVIDIA/nvidia-docker
Summary
Testing canvas elements and WebGL animations is a difficult task. To achieve smooth animations and good performance in end-to-end testing – the Playwright framework is a good choice. With proper configuration, we can run parallel tests using hardware acceleration. Achieving 60 frames per second in WebGL animation is possible even in Headless Chrome.

Source code of Playwright WebGL
Our example is hosted on github. Feel free to clone or download the working playwright script: https://github.com/createit-dev/168-headless-chrome-get-60fps-in-windows
That’s it for today’s tutorial. Don’t forget to subscribe to our newsletter to stay up-to-date with other useful tips and guidelines.
Do you need someone to implement this solution for you? Check out our specialists for hire in the outsourcing section. Are you considering a global project and are uncertain how to proceed? Maybe you need a custom web application? Reach us now!


![How to Fight AI Hallucinations About Your Brand [ready-to-use prompt inside]](https://www.createit.com/wp-content/uploads/2026/02/How-to-Fight-AI-Hallucinations-355x200.jpg)


